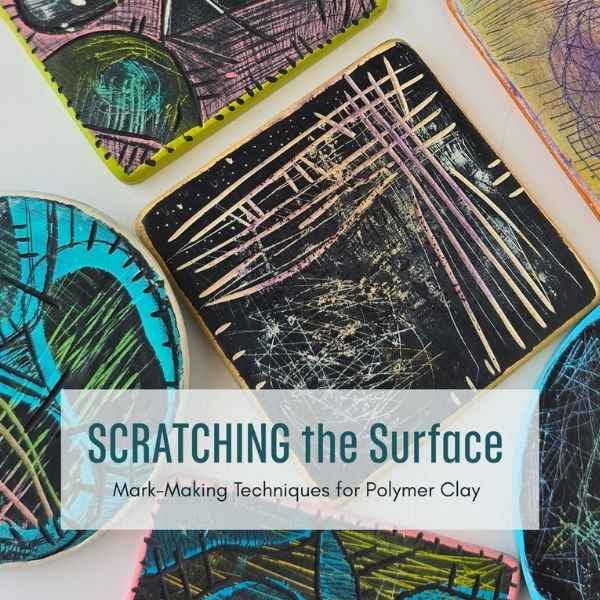
Scratching the Surface — A Polymer Clay Workshop for Colour, Mark-Making and Surface Design
If you’ve been around Shades of Clay for a while, you already know I’ve been teaching polymer clay techniques for years — especially through short, practical tutorials often using my CaBezel Jewelry Molds. You can find those videos here.
But Scratching the Surface is different.
This is my first professionally edited workshop, and I’m genuinely so proud of it. I created it to share a few of my favourite techniques that grew out of my own studio practice.
What I love most about this approach is how simple and portable it is.
You only need one colour of clay, and the real magic comes from paint and mark-making. For two of the techniques in this workshop, you can prep a whole batch of clay-covered wood pieces in advance, bake them once, and then they’re ready whenever inspiration hits — no oven needed after that. Add a few scratch tools and some paint, and you can create almost anywhere.
There’s also a third technique where we’ll work with unbaked clay and cut smaller shapes as components.
This is perfect if you’re making jewelry because you can do it later when you’re ready to assemble — and you can “audition” different shapes, sizes, and colours to see what looks best with the surfaces you’ve already created.
And even if you’re not a jewelry maker, these pieces can become small abstract artworks — framed in a shadow box, grouped on a wall, or styled on a shelf.
You Don’t Need Fancy Supplies
If you already work with polymer clay, you likely have almost everything you need.
The only things you may not already have are:
-
Wood blanks
-
A lino cutter / lino tool
Everything else is basic studio stuff:
-
Black Premo clay
-
Bakeable clay adhesive
-
A few acrylic paint colours
-
Simple mark-making tools (stylus, needle tool, scratching brush, etc.)
If your’re interested, you can find out more info about Scratching the Surface Workshop here.
Wendy XO


Leave a Reply
You must be logged in to post a comment.